Sanity CMS Minimum Viable Build
07 Jul 2020
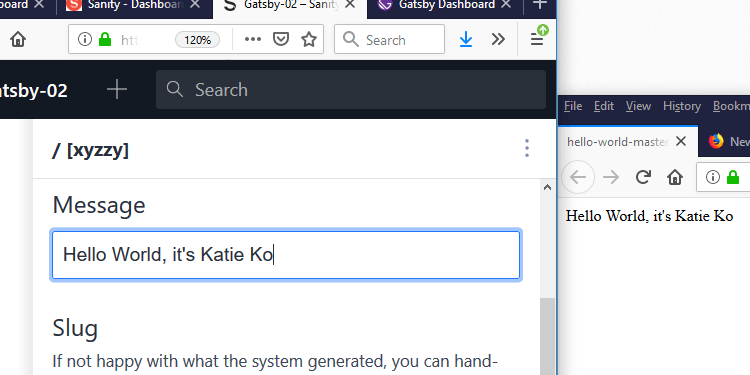
Table of Contents
- Goal
- Prerequisites
- Navigate the command line to an appropriate folder
- Log the Sanity CLI into Sanity.io
- Initialize a new Sanity project
- Look around the project
- Add an API key to the project
- Edit schema files on the hard drive
- Build, deploy, build again, deploy again
- Log into Sanity Studio
- Test basic API access
- Set up GraphQL API access
- Next steps
- Posts in this series
As step 1 (of 3) of my next project, I’ll set up Sanity CMS instead of markdown as a data source for the “Hello World” in my Gatsby-generated index.html.
Believe it or not, this will allow me to build a static web site with a “preview” version that content authors can watch change as they type into the Sanity Studio content management system.
<html>
	<head></head>
	<body>
		<div>Hello World</div>
	</body>
</html>
Goal
The goal of this tutorial is to make a lovely CMS that looks like this for a content author:
And helps me generates output like this that I can plug into Gatsby:

{
	"message":"Hello World",
	"slug":{
		"_type":"slug",
		"current":"/"
	},
	"template":"xyzzy"
}
Prerequisites
- Sign up for a Sanity.io account at https://accounts.sanity.io/signup/.
- Log into it at https://manage.sanity.io/.
- Install the Node.js JavaScript execution environment (here’s a Windows tutorial), being sure to include the npm package manager, on your computer.
- Make sure that your “path” environment variable for your operating system ends up configured so that when you execute
node -vandnpm -vfrom a command line interface, they both work (that is, you get a message back saying what version of Node or NPM you’re on). - This is harder than it sounds if you’re new to installing command-line tools on your computer. Be patient.
- Make sure that your “path” environment variable for your operating system ends up configured so that when you execute
- Install the Sanity CLI command-line tool using
npm.- Make sure that your “path” environment variable for your operating system ends up configured so that when you execute
sanity -v, you get a message back saying what version of “@sanity/cli” you’re on. - Did it take days to get this to work? Have a cupcake – you’ve earned it! It’ll be easier from here on out.
- Make sure that your “path” environment variable for your operating system ends up configured so that when you execute
- Optional: Install a tool on your computer capable of helping you make HTTP requests, such as Postman, Curl, or a general-purpose programming language with a request-making library (such as Python), and learn how to use it to make a basic
GET-typed HTTP request with customized headers.
Navigate the command line to an appropriate folder
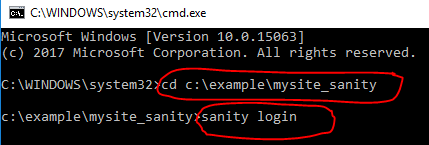
I decided I wanted to work out of a folder on my hard drive called C:\example\mysite_sanity.
Therefore, after I brought up my operating system’s command prompt (I opened it with windows-key, cmd, and enter on Windows), I typed the following at the prompt:
cd C:\example\mysite_sanity
Log the Sanity CLI into Sanity.io
Once there, I type the following into my command line:
sanity login
I tap the down arrow on my keyboard until E-mail / password is highlighted in turquoise with a > to the left of it and hit enter.
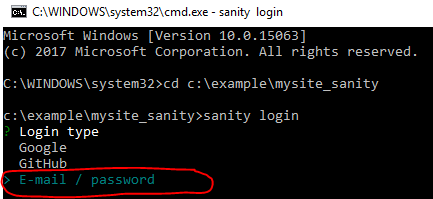
Presuming that my computer’s default web browser is already logged into Sanity.io, I will see a confirmation screen in my web browser that I can close. (If I’m not logged in in my web browser, I might have to log into my sanity.io account.)

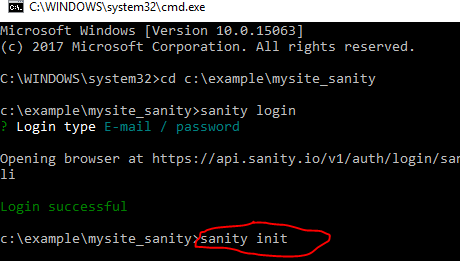
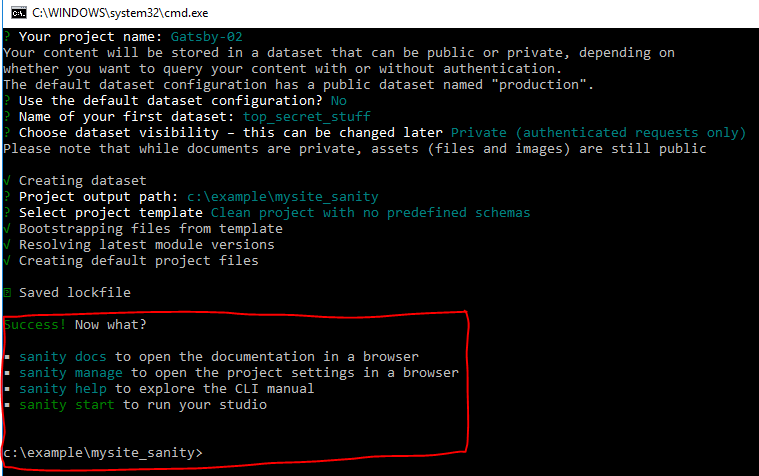
Initialize a new Sanity project
In my command line, I type:
Once there, I type the following into my command line:
sanity init
I use my keyboard’s up and down arrow keys to highlight Create new project in turquoise (which also puts a > to the left of it) and hit enter.
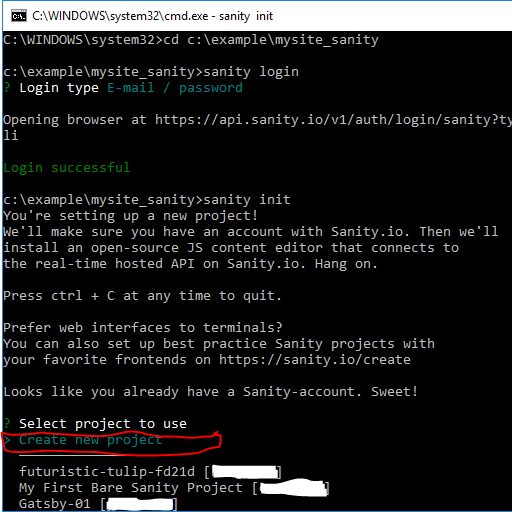
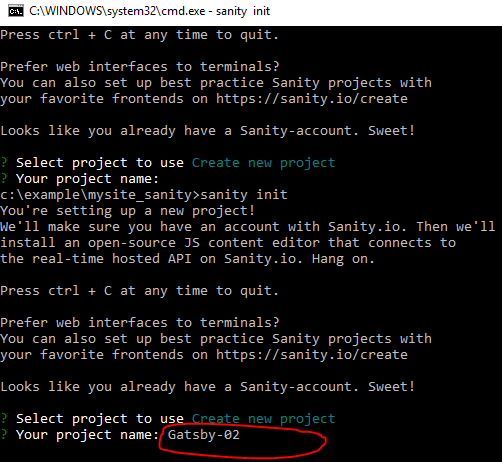
I backspace out the auto-suggested (My Sanity Project) and instead type a name I like for my project.

I personally decided upon Gatsby-02.
For demonstration purposes, I overrode the default dataset configuration by typing n when asked.

Instead, I decided to create a Sanity “dataset” called top_secret_stuff.
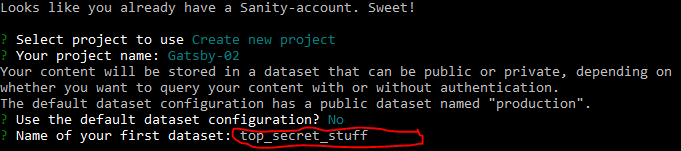
I arrowed up and down until Private (authenticated requests only) was highlighted turquoise and had a > to the left of it, then hit enter.
“Hello World” isn’t really going to be a big secret – it’s going right on my web site – but I want to show you how private data sets get used.

Since I had already navigated to C:\example\mysite_sanity before starting all this, I don’t have to backspace out and re-type the directory that I’d like to put my local “Sanity project” files in – so I just hit enter when Sanity suggests that I install my project there.
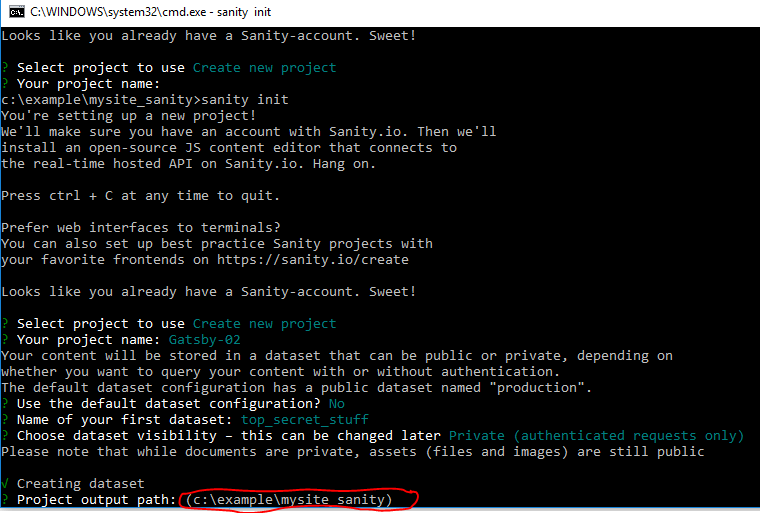
We’ll start with as few files as Sanity lets us – I’ll arrow down until I have Clean project with no predefined schemas selected and hit enter.
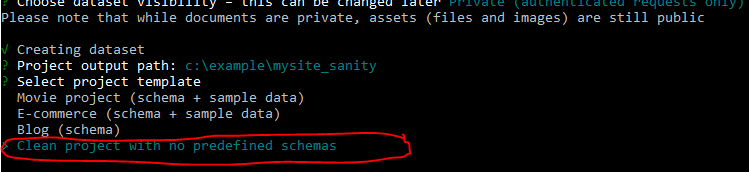
This is what Sanity looks like while initializing my project. It takes it a moment, because it’s downloading code from the internet.
Look around the project
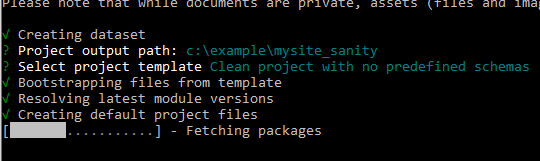
Here’s what it looks like in the command line when it’s done:
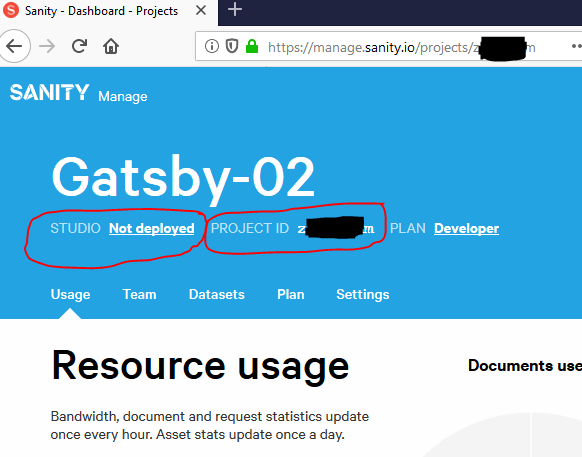
And here’s what it looks like at https://manage.sanity.io when it’s done.

If I run this command, I can see it in the context of other projects I created earlier:
sanity projects list

If I click on my project itself, I’m taken to https://manage.sanity.io/projects/my-project-id/.
- Here, my project ID starts with “z” and ends with “m.”
- I don’t yet have a link next to
studio, which will be my editor – I’ll make one soon enough.
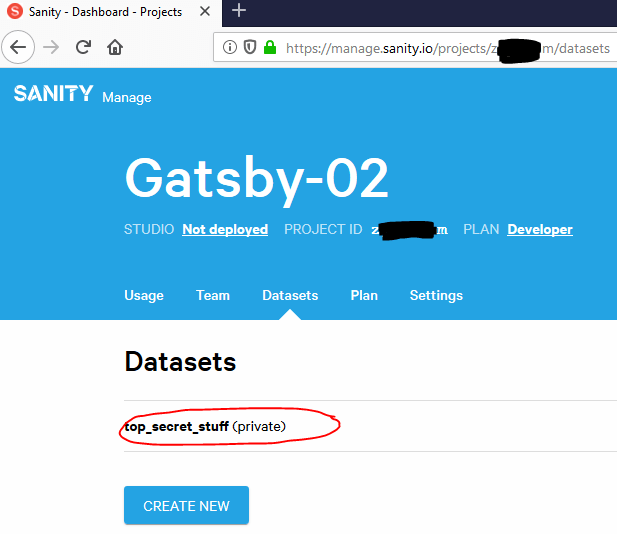
Clicking on the “datasets” tab, I can see top_secret_stuff.
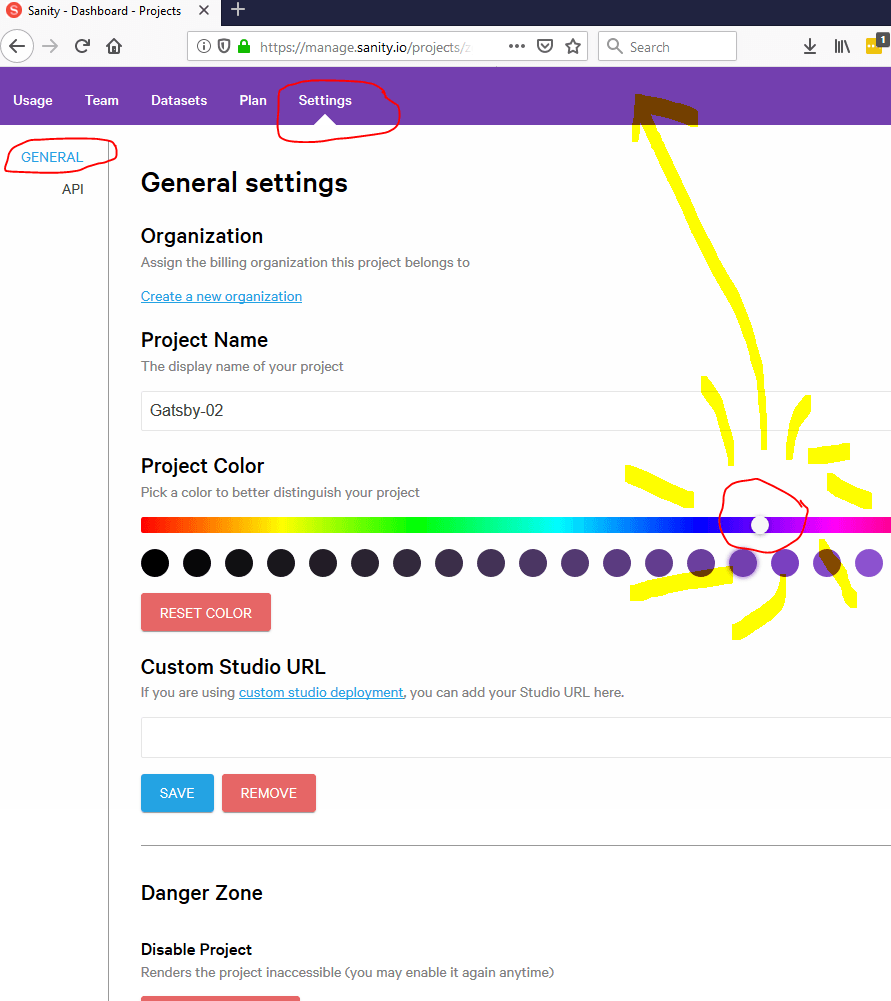
Clicking on the “settings” tab, I can change this project’s color theme to purple, just for fun.
Add an API key to the project
Clicking the “API” navigation item at left, I’ll find a page where I can click Add New Token.
Having a token is what will let computer systems read data out of my private dataset.
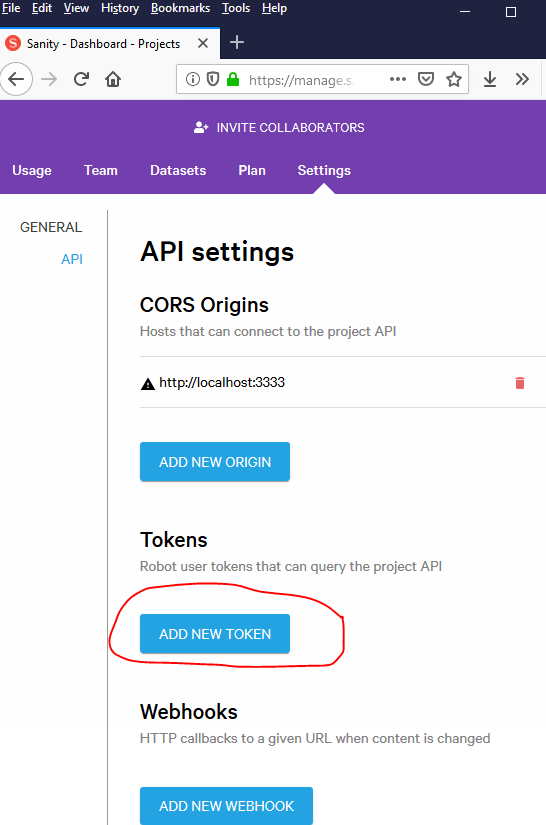
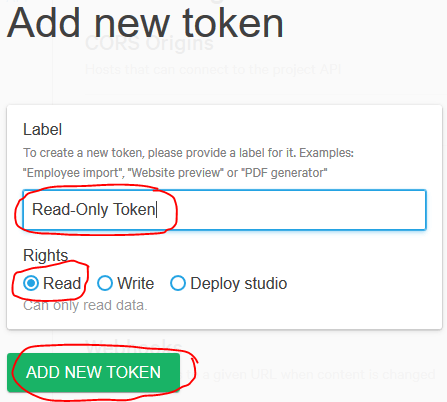
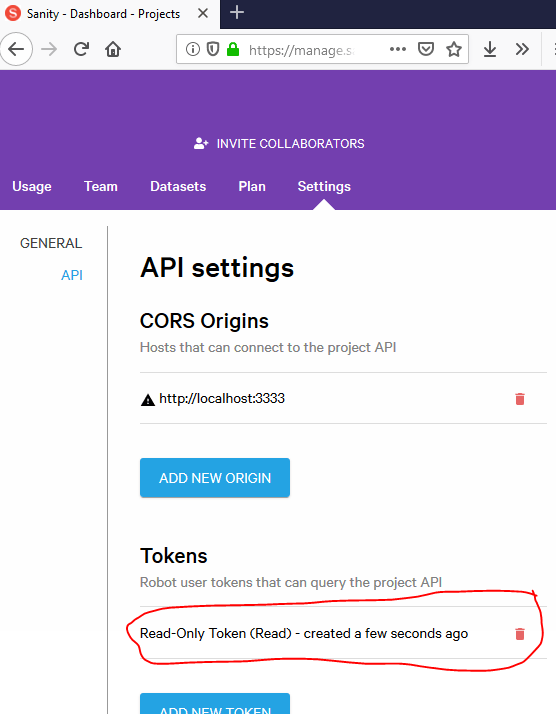
I’ll call mine Read-Only Token, set its rights to Read, and click Add New Token.
When the token pops up, I have to copy it to my password manager – I can’t get it back.
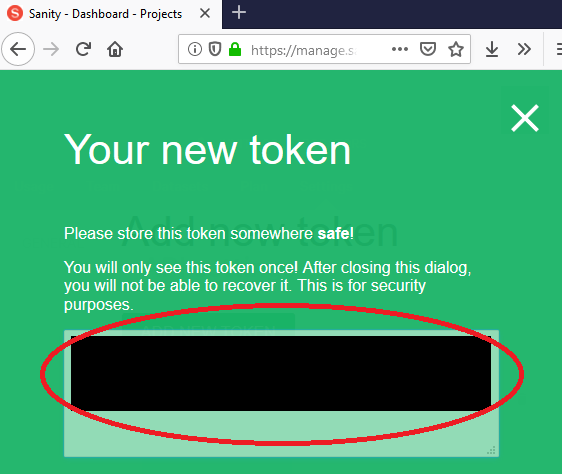
That said, I can easily delete this token and start over if I fail to copy/paste it properly.
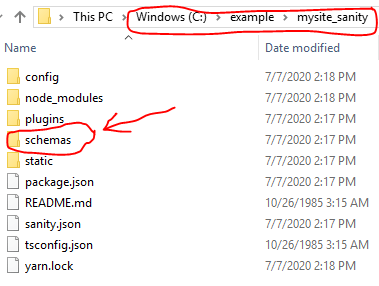
Edit schema files on the hard drive
On my own hard drive at C:\example\mysite_sanity, I can see that Sanity installed a bunch of files.
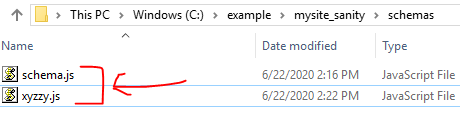
Honestly, I only care about the ones in the schemas folder.
/schemas/schema.js
schema.js in the schemas folder is the master file defining my Sanity schema.
I’ll use it to tell Sanity about all the other “schema definition” files I create (which in this case, there will be just one of).
It comes like this:
// First, we must import the schema creator
import createSchema from 'part:@sanity/base/schema-creator'

// Then import schema types from any plugins that might expose them
import schemaTypes from 'all:part:@sanity/base/schema-type'

// Then we give our schema to the builder and provide the result to Sanity
export default createSchema({
  // We name our schema
  name: 'default',
  // Then proceed to concatenate our document type
  // to the ones provided by any plugins that are installed
  types: schemaTypes.concat([
    /* Your types here! */
  ])
})
I update it to say this:
// First, we must import the schema creator
import createSchema from 'part:@sanity/base/schema-creator'

// Then import schema types from any plugins that might expose them
import schemaTypes from 'all:part:@sanity/base/schema-type'

// We import object and document schemas
import xyzzy from './xyzzy'

// Then we give our schema to the builder and provide the result to Sanity
export default createSchema({
  // We name our schema
  name: 'default',
  // Then proceed to concatenate our document type
  // to the ones provided by any plugins that are installed
  types: schemaTypes.concat([
    // The following are document types which will appear
    // in the studio.
    xyzzy
    // When added to this list, object types can be used as
    // { type: 'typename' } in other document schemas
  ])
})
/schemas/xyzzy.js
I promised schema.js an “xyzzy” schema, so I also added a new file to the schemas folder and called it xyzzy.js.
Its contents are as follows:
import icon from 'react-icons/lib/md/note-add'

export default {
  name: 'xyzzy',
  title: 'X y zz y',
  type: 'document',
  icon,
  fields: [
    {
      name: 'template',
      title: 'Template',
      type: 'string'
    },
    {
      name: 'message',
      title: 'Message',
      type: 'string'
    },
    {
      name: 'slug',
      title: 'Slug',
      type: 'slug',
      description: 'If not happy with what the system generated, you can hand-edit it here'
    }
  ],
  preview: {
    select: {
      slug: 'slug',
      template: 'template',
	  message: 'message'
    },
    prepare(selection) {
      const {slug, template, message} = selection
      return {
        title: `${slug.current} [${template}]`,
        subtitle: message
      }
    }
  }
}
Since I intend to rebuild this Gatsby “Hello World” project using Sanity’s API instead of Markdown files as a data source, I’m sticking with the notion of each data item that needs to become a “page” having template and message properties into which I’ll type things like “xyzzy” and “message.”
(Maybe it’s a little confusing that I decided to name my Sanity object type xyzzy as well as that being the value I intend to type into template the first time I use it – sorry.)
Because there won’t be a folder-of-files structure like /src/pages/ from which Gatsby can infer what page URL I intend to translate a given piece of data into, I’ll also need to hand-type a URL suffix, or “slug.”
fields is where I set all that up.
The icon bit at the top just makes things pretty in “Sanity Studio,” as does the preview stuff at the bottom.
How to build files like xyzzy.js
- See Sanity’s official schema documentation.
- Make a 2nd Sanity project on your hard drive where, instead of doing
sanity initwithClean project with no predefined schemas, follow these instructions first with one of the sample options likeMovie project,E-commerce, orBlog. Try to reverse-engineer what “schema” code seems to correspond to what user experiences you see in Sanity Studio. Personally, I learned a lot fromMovie Project.
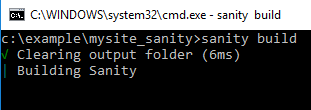
Build, deploy, build again, deploy again
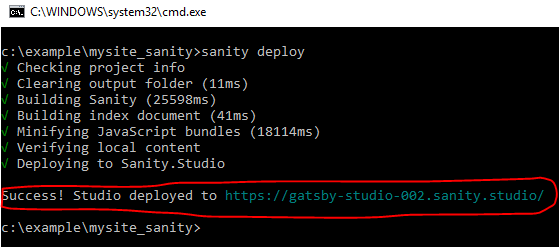
To prepare this configuration of Sanity Studio, with my “schema” definitions and all, for deployment to Sanity’s cloud, I run the following command in my command line:
sanity build
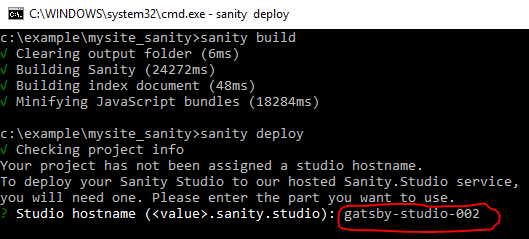
Then I run this command:
sanity deploy

The command prompt asks me for a URL prefix at which I’d like to access my “Sanity Studio” for this project.
I chose gatsby-studio-002.
Then, the command line just sort of … does nothing. For 5 minutes. For me, anyway.
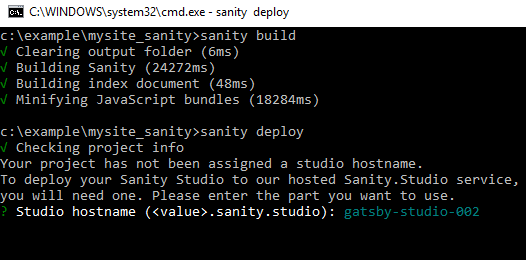
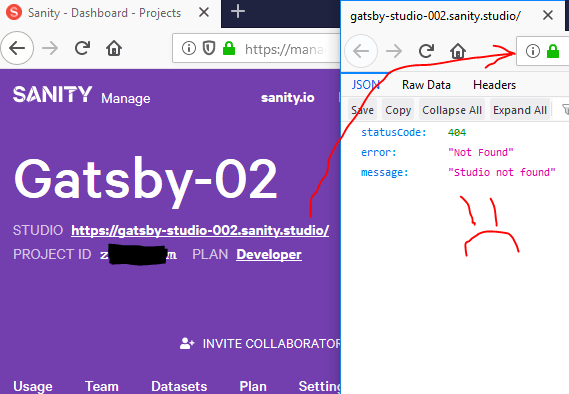
Eventually, refreshing https://manage.sanity.io/projects/my-project-id/ shows https://gatsby-studio-002.sanity.studio as my studio URL, but if I try to visit it, I get a “Studio not found” error as JSON-formatted text.
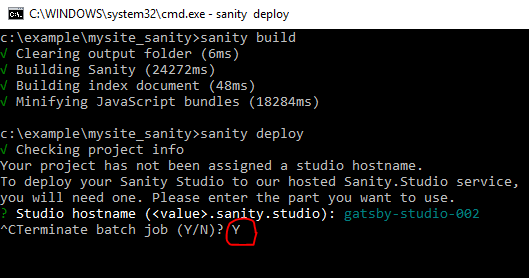
I gave it a couple more minutes, then hit “Ctrl+Break” on my keyboard and typed Y and hit enter to stop this deployment that clearly wasn’t going anywhere.
I ran sanity build again:
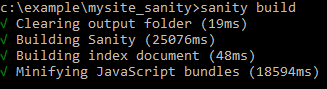
Then ran sanity deploy again:
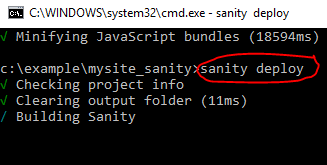
And this time, in less than a minute, it worked.
That’s been my approach twice now, so hopefully it works for you if you run into trouble.
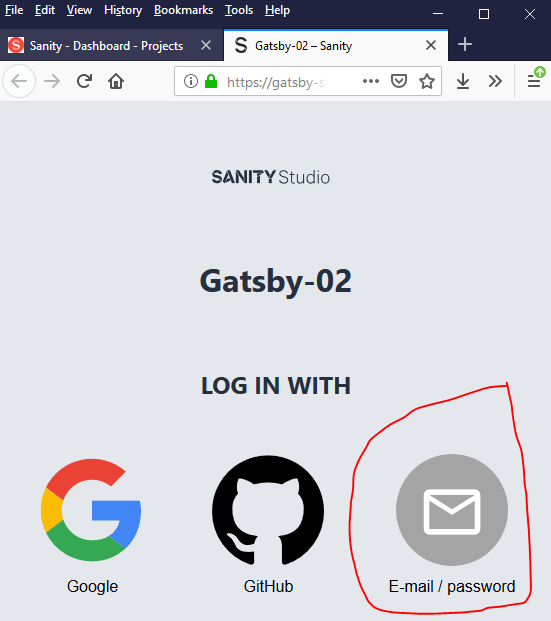
Log into Sanity Studio
Now, visiting https://gatsby-studio-002.sanity.studio from my project dashboard, I’m prompted to log in.
I click E-mail / password.
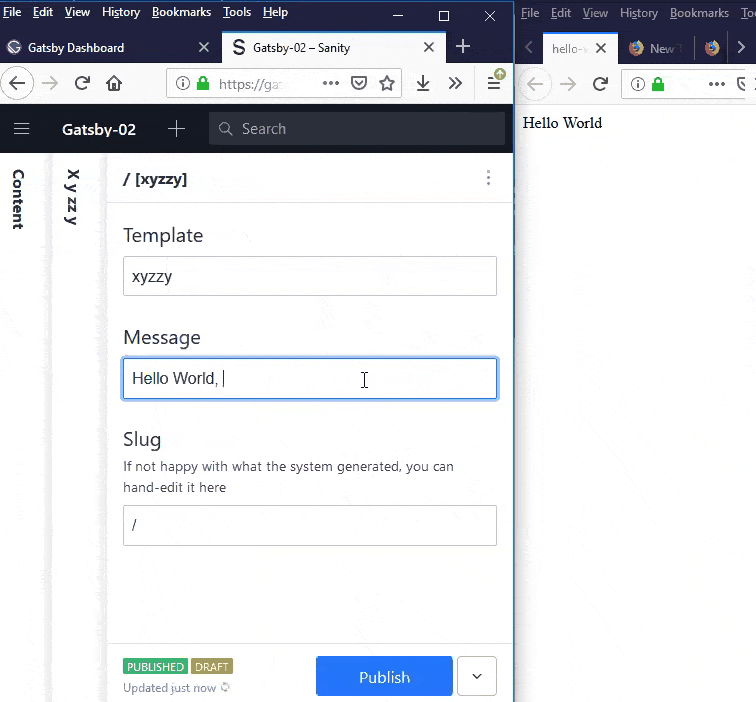
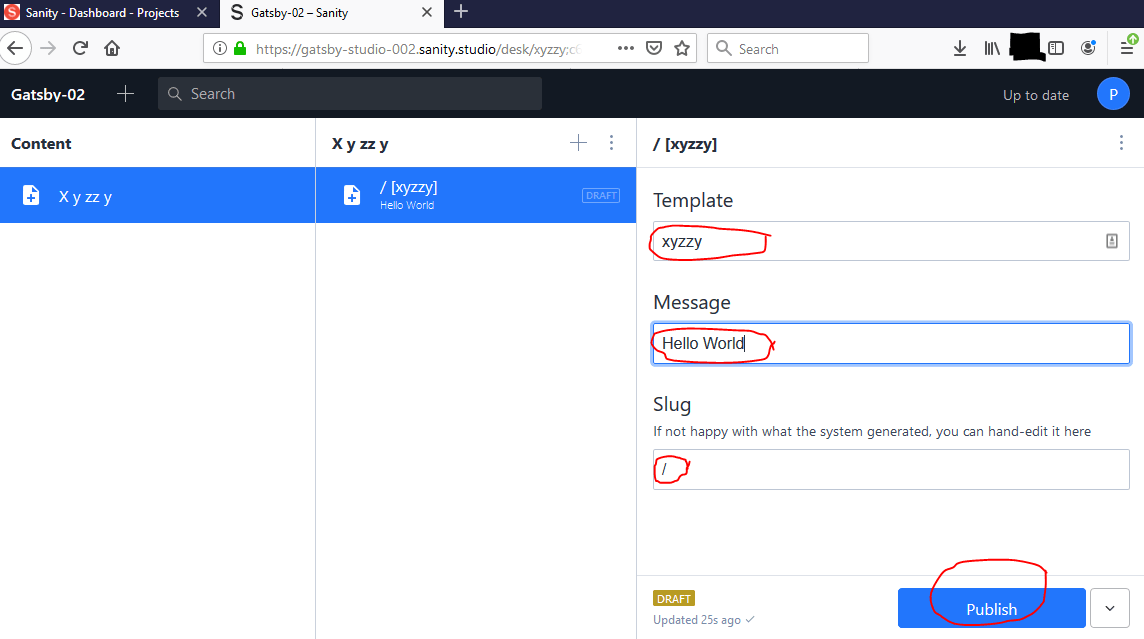
From there, I arrive at https://gatsby-studio-002.sanity.studio/desk, where I see a content type of X y zz y, just like I defined as the title property in xyzzy.js. Neat!
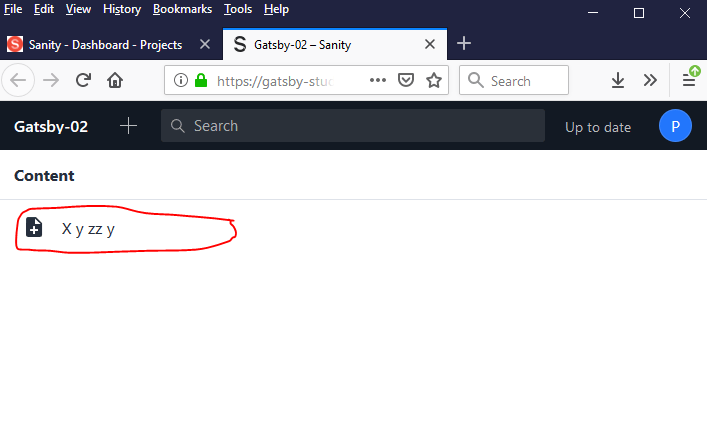
Clicking on X y zz y, I see a plus sign in the far right and click it.
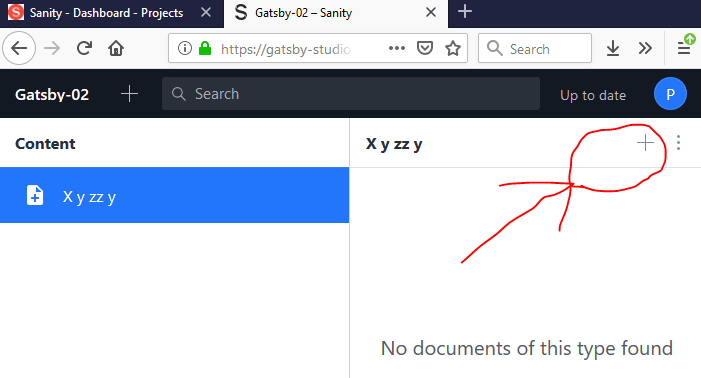
I’m prompted to type in a template (I type xyzzy), message (I type Hello World), and slug (I type / to indicate that I’d like this content to serve as my web site’s home page).
Note that in the top center of the page, I see “/ [xyzzy]” in big text and “Hello World” in small text as a “preview” of this particular item in my data set, based on the way I’d asked for title (slug followed by the template in square brackets) and subtitle (message) to be rendered in the preview I defined in xyzzy.js.
It’s not a particularly attractive preview of my data, but it got the job done for demonstration purposes.
Test basic API access
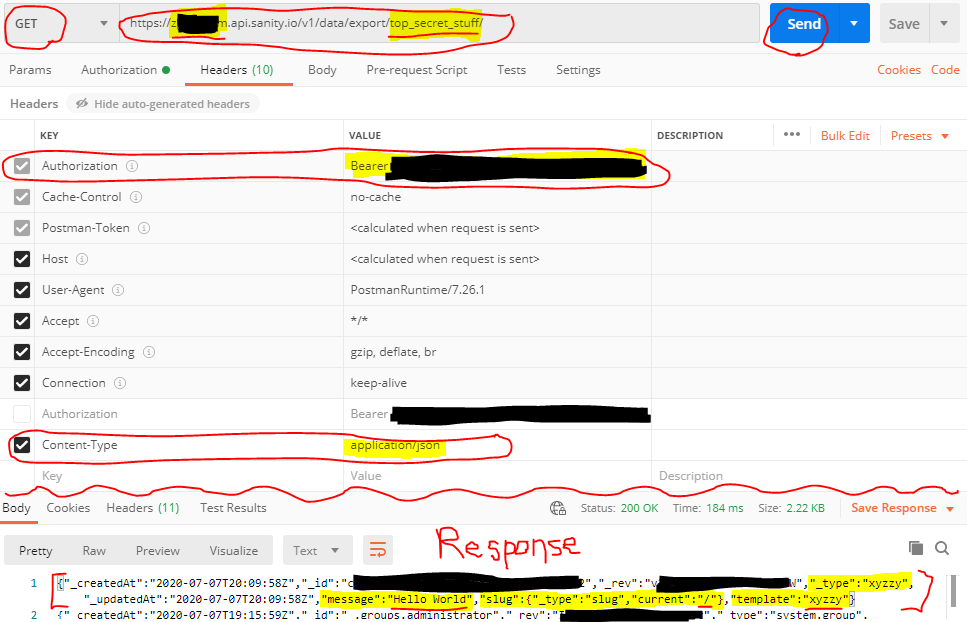
To confirm that my data is really available to the outside world, I fire up Postman.
I set up an HTTP requests with a method of GET, an endpoint of https://my-project-id.api.sanity.io/v1/data/export/top_secret_stuff, an Authorization header that starts with the phrase “Bearer ” and ends with the secret token I saved earlier, and a Content-Type header of application/json, then hit Send.
At bottom, I can see traces of the data I entered in Sanity’s HTTP response body: part of it mentions Hello World, /, and xyzzy both as the template value I typed and, perhaps a bit confusingly – sorry – as the data type of the content itself (as defined in the name property from xyzzy.js).
Set up GraphQL API access
I also want Sanity to make my data available to the outside world in a way that accepts a data-querying language called GraphQL, since that’s what a prebuilt plugin for Gatsby relies upon when connecting to Sanity to query my data.
If I build an HTTP request in Postman with a method of POST, an endpoint of https://my-project-id.api.sanity.io/v1/graphql/top_secret_stuff/default, an Authorization header that starts with the phrase “Bearer ” and ends with the secret token I saved earlier, and a Body in GraphQL syntax with a blank “GraphQL Variables” section but a Query section containing the following code:
{
  allXyzzy {
    message
    template
    slug {
      current
    }
  }
}
Unfortunately, I get the following HTTP response body from Sanity:
{
	"statusCode": 404
	"error": "Not Found",
	"message": "GraphQL schema not found for dataset/tag"
}
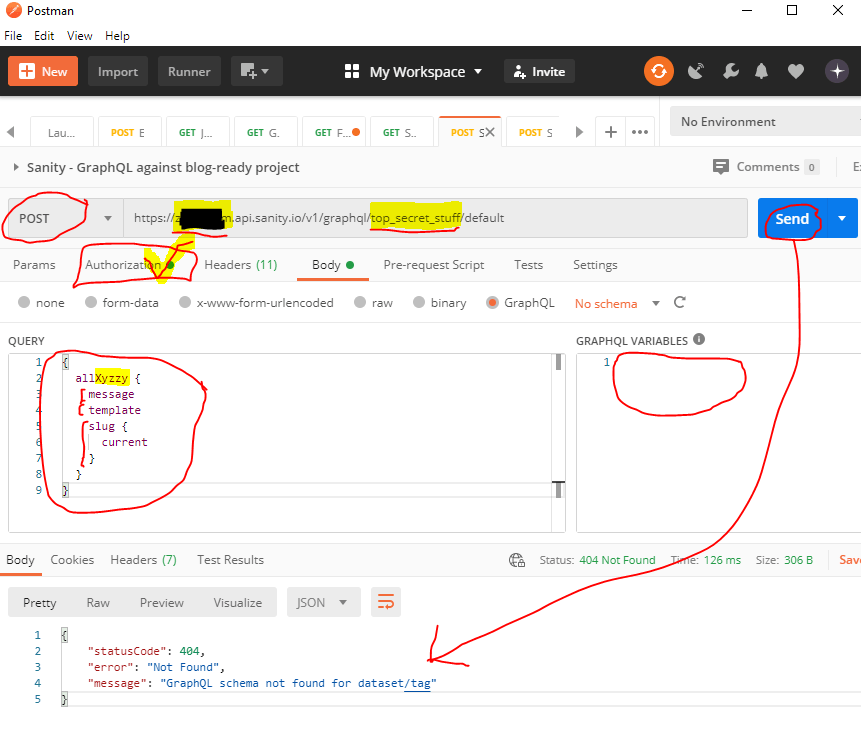
Bummer.
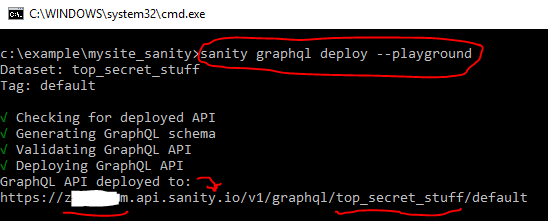
It turns out that I have to explicitly tell Sanity that I’d like to enable GraphQL-based queries.
I do this by typing the following command into my computer’s command prompt:
sanity graphql deploy --playground
Now when I re-run the same HTTP request that just failed on me, I get the following response body:
{
    "data": {
        "allXyzzy": [
            {
                "message": "Hello World",
                "template": "xyzzy",
                "slug": {
                    "current": "/"
                }
            }
        ]
    }
}
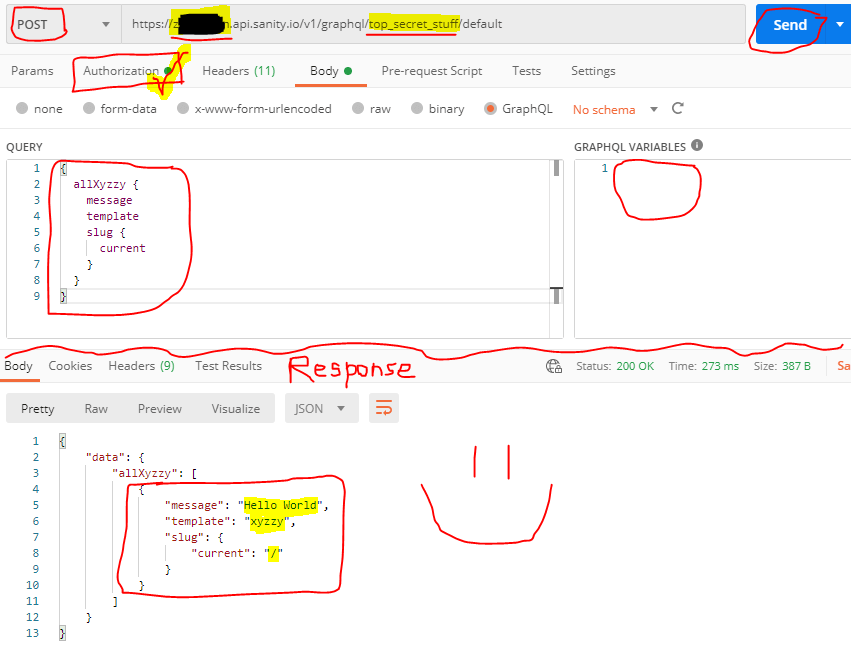
Much better!
If you’re not used to writing GraphQL queries (I’m certainly not), visit https://your-project-id.api.sanity.io/v1/graphql/your-dataset-name/default, replacing your-project-id and your-dataset-name, of course, in a web browser while logged into Sanity.
That’s the “playground” you set up by adding the --playground flag to your Sanity CLI command deploying a graphql interface for your dataset.
It comes with an editor and a big “run button” where you can make all the typos you want as you learn GraphQL. It also gives you some hints while you type.

Next steps
Stay tuned – next I’ll set up a Gatsby site that not only displays my “Hello World” on the home page, but has a “live preview” that changes as people edit the value of message in Sanity Studio when executed in “gatsby develop” mode.

Posts in this series
- Part 1 - Gatsby for novices and dabblers
- Part 2 - Gatsby Minimum Viable Build
- Part 3 - Gatsby React Minimum Viable Markdown Template / Component
- Part 4 - Gatsby React WYSIWYG CMS-Friendly Markdown
- Part 5 - Why WYSIWYG static site CMS's love Gatsby
- Part 6 - This Article
- Part 7 - Gatsby Minimum Viable Sanity Template
- Part 8 - Gatsby Cloud live previews for Sanity-based sites
- Part 9 - Heroku live previews for Gatsby + Sanity sites
- Part 10 - Movable page builder components in Sanity CMS
